Automating Azure WebJob Deployments Using YAML
This post is a follow-up to my first on automating Azure WebJob deployments. This time, instead of using the Classic UI to build the Azure DevOps build and release pipelines, we will be using YAML syntax to create the pipeline. While there is a learning curve, the benefit of using YAML is version control. If changes to the pipeline result in failing builds or deployments, the file can be rolled back to an earlier version to restore a working version of the pipeline. Changes to the pipeline can also be monitored through code reviews.
In this example, we will be building and deploying a .NET Core 3.1 console application as a WebJob.
Required Resources
- Azure subscription
- Azure Resources:
- Azure Resource Group
- Azure App Service Plan
- Azure App Service
- Azure DevOps Account
- Azure DevOps Project
- .NET Core 3.1 Console Application
Automated Deployment Instructions
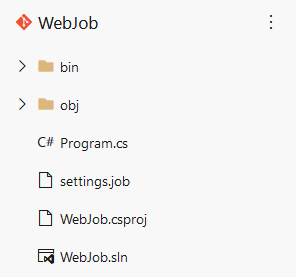
Create a repository within your Azure DevOps project and upload your WebJob application. It should look something like this within your repository:
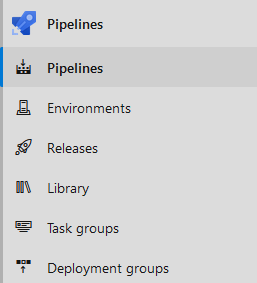
Within your Azure DevOps Project, select the “Pipelines” option under the “Pipelines” section, and then click the “New pipeline” button within the page.
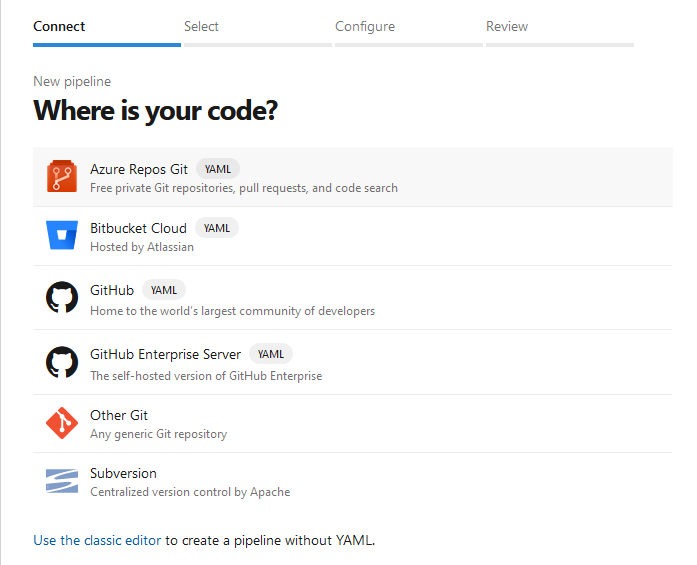
Under “Where is your code?”, select the “Azure Repos Git (YAML)” option.
Select your repository, and then on the “Configure your pipeline” window, select “ASP.NET”. This will produce a sample YAML pipeline that you will now modify. Copy the following code, making sure to replace the variables with the desired name of your WebJob and the name of your App Service.
trigger:
    - master

    pool:
      vmImage: 'ubuntu-latest'

    # Modify these variables
    variables:
    - name: WebJobName
      value: <NameOfYourWebJob>
    - name: WebAppName
      value: <NameOfYourWebAppResource>

    stages:
    - stage: Build
      displayName: WebApp Build Stage
      jobs:
      - job: Build
        displayName: Build
        steps:

        - task: DotNetCoreCLI@2
          displayName: Publish Project As WebJob
          inputs:
            command: 'publish'
            publishWebProjects: false
            projects: '**/*.csproj'
            arguments: '--output $(Build.ArtifactStagingDirectory)/WebJob/App_Data/jobs/triggered/$(WebJobName)'
            zipAfterPublish: false
            modifyOutputPath: false

        # only for a scheduled triggered WebJob
        - task: CopyFiles@2
          displayName: Create Schedule For WebJob
          inputs:
            Contents: '**/*.job'
            TargetFolder: '$(Build.ArtifactStagingDirectory)/WebJob/App_Data/jobs/triggered/$(WebJobName)/'

        - task: PowerShell@2
          displayName: Generate run.cmd For WebJob
          inputs:
            targetType: 'inline'
            script: '"dotnet $(WebJobName).dll" | Out-File run.cmd -Encoding ASCII; $LASTEXITCODE'
            pwsh: true
            workingDirectory: '$(Build.ArtifactStagingDirectory)/WebJob/App_Data/jobs/triggered/$(WebJobName)'

        - task: ArchiveFiles@2
          displayName: Zip Desired Files
          inputs:
            rootFolderOrFile: '$(Build.ArtifactStagingDirectory)/WebJob/'
            includeRootFolder: false
            archiveType: 'zip'
            archiveFile: '$(Build.ArtifactStagingDirectory)/$(WebJobName).zip'
            replaceExistingArchive: true

        - task: PublishPipelineArtifact@1
          displayName: Publish All Artifacts
          inputs:
            targetPath: '$(Build.ArtifactStagingDirectory)'
            publishLocation: 'pipeline'

    - stage: Deploy
      dependsOn: Build
      displayName: Deploy-WebJob

      jobs:
        - deployment: DeployWeb
          displayName: Deploy WebJob App
          strategy:
            runOnce:
              deploy:
                steps:
                - download: none

                - task: DownloadPipelineArtifact@2
                  displayName: 'Download Build Artifact'
                  inputs:
                    path: '$(System.ArtifactsDirectory)'

                - task: AzureWebApp@1
                  inputs:
                    azureSubscription: '<YOURAZURESUBSCRIPTION>'
                    appType: 'webApp'
                    appName: $(WebAppName)
                    package: '$(System.ArtifactsDirectory)/Build.Build/$(WebJobName).zip'
                    deploymentMethod: 'zipDeploy'
Now, let’s walk through each task of the YAML pipeline. First, we will cover the tasks that comprise the build portion of the pipeline.
First, we will cover the tasks that comprise the build portion of the pipeline.
        - task: DotNetCoreCLI@2
          displayName: Publish Project As WebJob
          inputs:
            command: 'publish'
            publishWebProjects: false
            projects: '**/*.csproj'
            arguments: '--output $(Build.ArtifactStagingDirectory)/WebJob/App_Data/jobs/triggered/$(WebJobName)'
            zipAfterPublish: false
            modifyOutputPath: false
In this task, we publish the WebJob application. We make sure to output the project using the specified file path because it’s required for the Azure App Service to recognize that it’s a WebJob during deployment. “app_data\jobs\triggered\<WebJobName>” for a triggered WebJob and “app_data\jobs\continuous\<WebJobName>” for a continuous WebJob. Make sure to specify that the modifyOutputPath is set to false, because otherwise, the project will be published to a directory named “/s” appended to your specified output file path, which will cause your WebJob deployment to fail.
        # only for a scheduled triggered WebJob
        - task: CopyFiles@2
          displayName: Create Schedule For WebJob
          inputs:
            Contents: '**/*.job'
            TargetFolder: '$(Build.ArtifactStagingDirectory)/WebJob/App_Data/jobs/triggered/$(WebJobName)/'
If you are creating a triggered WebJob that you want to trigger on a schedule, include this task to copy the settings.job file to the directory of the WebJob so it will all be published together as a build artifact. Refer to my first blogpost for how to create the settings.job file. If you are not creating a scheduled WebJob, do not include the task.
- task: PowerShell@2
  displayName: Generate run.cmd For WebJob
  inputs:
    targetType: 'inline'
    script: '"dotnet $(WebJobName).dll" | Out-File run.cmd -Encoding ASCII; $LASTEXITCODE'
    pwsh: true
    workingDirectory: '$(Build.ArtifactStagingDirectory)/WebJob/App_Data/jobs/triggered/$(WebJobName)'
Create a run.cmd for your console application WebJob by including this PowerShell Task. This is required for your console application to run.
- task: ArchiveFiles@2
  displayName: Zip Desired Files
  inputs:
    rootFolderOrFile: '$(Build.ArtifactStagingDirectory)/WebJob/'
    includeRootFolder: false
    archiveType: 'zip'
    archiveFile: '$(Build.ArtifactStagingDirectory)/$(WebJobName).zip'
    replaceExistingArchive: true
With this task, we are explicitly zipping up our WebJob with the appropriate file path for publishing.
- task: PublishPipelineArtifact@1
  displayName: Publish All Artifacts
  inputs:
    targetPath: '$(Build.ArtifactStagingDirectory)'
    publishLocation: 'pipeline'
Then, we publish our zip file to the pipeline so the release tasks in the pipeline can access the resulting build artifact.
Now, we move onto the tasks of the release portion of the pipeline.
- task: DownloadPipelineArtifact@2
  displayName: 'Download Build Artifact'
  inputs:
    path: '$(System.ArtifactsDirectory)'
First, we download the build artifact to $(System.ArtifactsDirectory).
- task: AzureWebApp@1
  inputs:
    azureSubscription: '<YOURAZURESUBSCRIPTION>'
    appType: 'webApp'
    appName: $(WebAppName)
    package: '$(System.ArtifactsDirectory)/Build.Build/$(WebJobName).zip'
    deploymentMethod: 'zipDeploy'
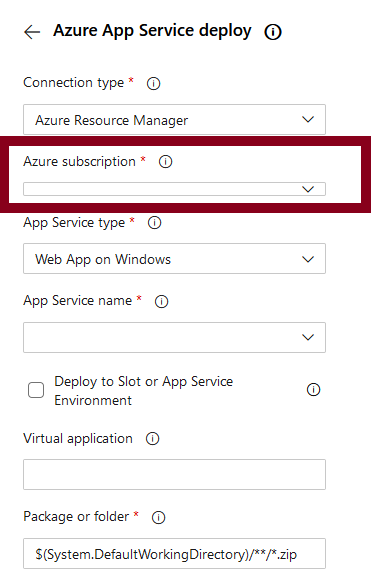
Then, we use ‘zipDeploy’ option for the deploymentMethod parameter to deploy the WebJob to our App Service. Make sure you fill in your Azure Subscription for the task’s azureSubscription parameter. The easiest way to figure out what you should fill in for that property is to select the “Azure App Service deploy” task in the tasks sidebar of the edit pipelines view within Azure DevOps. Then, within the dropdown under Azure Subscription, select your subscription and copy the text exactly.

Run your pipeline and then once all stages have finished successfully running, check your Azure App Service under the WebJobs tab, and you should see your successfully deployed WebJob!